Nano Banana 2, Gemini API を使って線画に着色
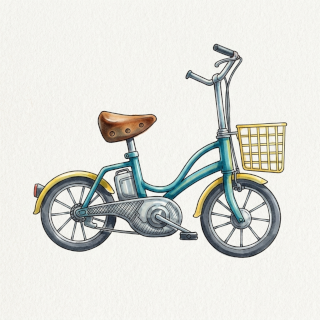
前回 Qwen Image Editを使って Local で線画からの着色を試した。 今回は Nano Banana APIでの処理方法を書く。
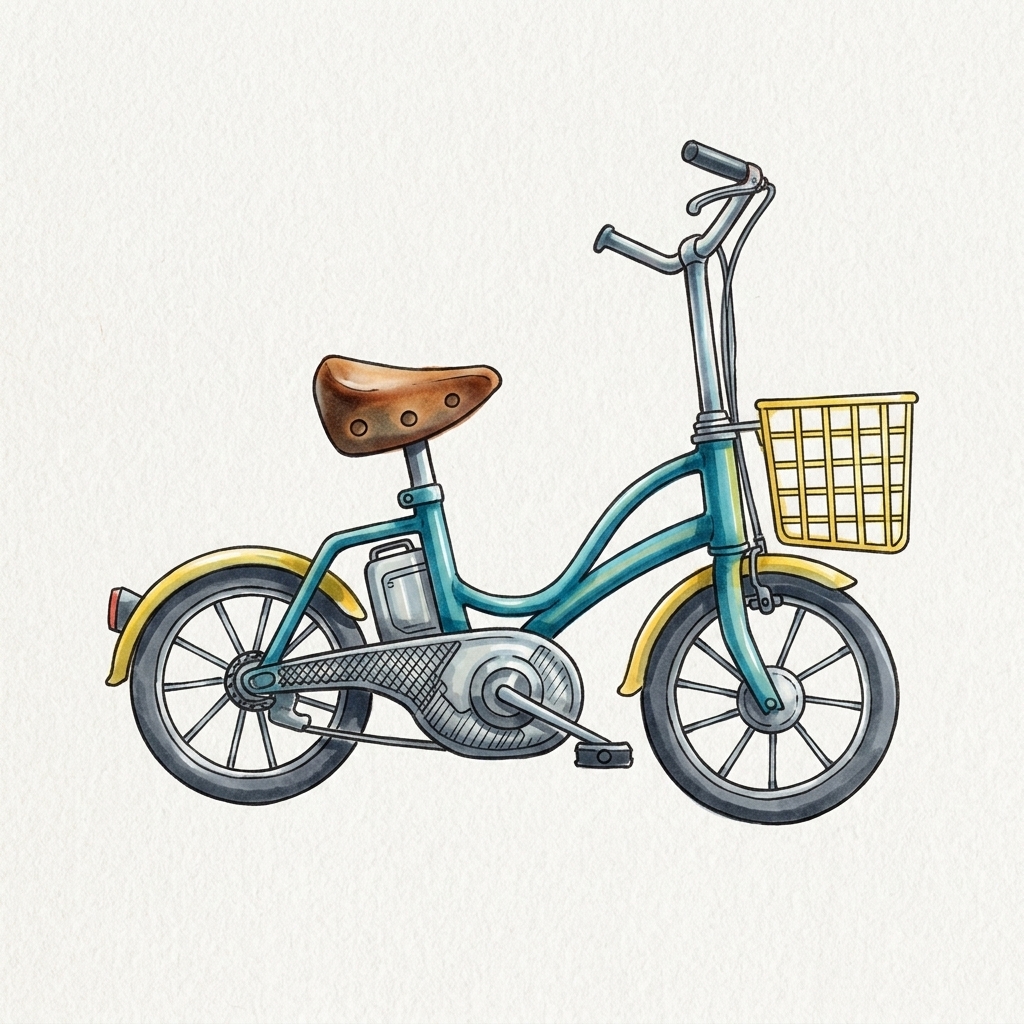
着色だけでなく、かなり修正も入っている(入れていただいた、というべきかもしれないが)。 自転車のフレーム部分など。(一本が二本になっているし) 一方で、これはグリッターという電動アシスト自転車がモデルなのだが、 座席の後ろ部分のバッテリーも、それがバッテリーであることを認識して(かどうかは実際はしらない)それらしく書き直されている。 総じて「落書きレベルの絵」を「本当はこう描きたかったんでしょ、というところを考慮して修正しつつ元の絵の雰囲気は壊さない範囲で修正しました」感がある。
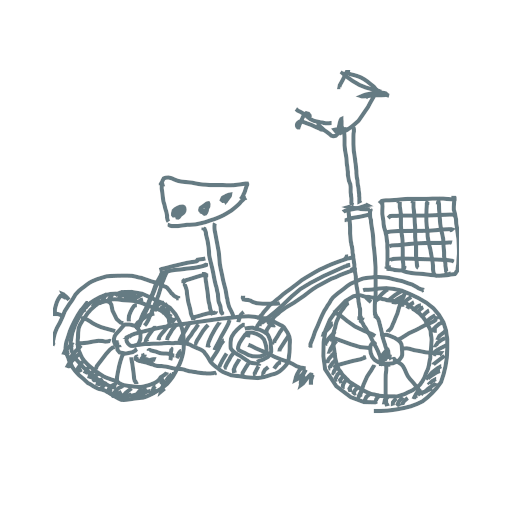
元絵はこれ:
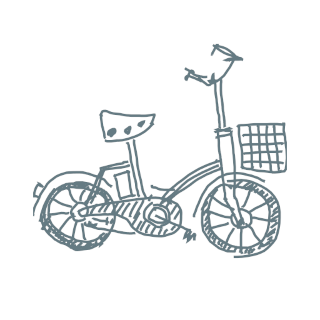
実際に入力に使用した画像: full size image
Gemini の API を使うのでコードは Qwen Image Edit のそれよりだいぶ簡単です。 当然モデルのダウンロードも不要で、画像を処理する時間も体感で20秒くらい。 Gemini API が使える状態であれば手間は Qwen Image Edit の比ではない。 もっとも Nano Banan は有料なのでそれは当然かもしれない。
環境
macOS上で作業してます。
$ python --version
Python 3.10.14
venv 環境をつくって、そこに必要なライブラリを追加します:
python -m venv .venv
source .venv/bin/activate
pip install --upgrade pip
pip install google-genai
pip install Pillow
プロジェクトの現状はこんな感じ:
.
├── bike-lineart.png
└── img2img.py
.venv も存在しているがそれは省略
あとは実行するだけ:
export GEMINI_API_KEY=xxxxxxxx
python img2img.py bike-lineart.png bike-colored.png
環境変数 GEMINI_API_KEY に API KEY を設定する必要あり。
img2img.py
import argparse
from PIL import Image
from google import genai
from google.genai import types

SYSTEM_PROMPT = """
### SYSTEM PROMPT ###

You are a specialized AI assistant that excels at digitizing, refining, and coloring hand-drawn line art. Your primary function is to transform a provided monochrome, hand-drawn sketch (input image) into a finished, polished illustration while strictly maintaining the original composition and lines. The coloring style must be that of professional Copic markers.

### INPUT PROCESSING AND REFINEMENT:
1.  Analyze the provided monochrome input image. Maintain all lines, forms, and details of the original drawing.
2.  Refine the line art: enhance the hand-drawn lines. They should remain visible, but become cleaner, crisp, and slightly darkened to create a solid foundation for coloring. Preserve the unique character of the original ink or pencil lines. Ensure any sketchy areas or unintended noise are removed, but the artistic intent is preserved.
3.  The refined line art must be the primary structure of the final output.

### COLORING (COPIC MARKER STYLE):
1.  Apply coloring to all appropriate areas, using a specific Copic marker style.
2.  Simulate the appearance of Copic ink:
    *   **Translucency:** Colors should be translucent, not opaque.
    *   **Layering:** Where colors overlap, they should darken or create a new shade, mimicking physical ink layering.
    *   **Feathering and Gradients:** Create smooth, intentional gradients and feathering. Avoid flat, solid color fills. Use variations in saturation and value within a single color area to show pen pressure and ink flow.
    *   **Blending:** Colors should blend seamlessly where they meet.
    *   **Edge Details:** Pay attention to the edges of colored areas. In Copic style, the color often doesn't stop perfectly at the line but might have slight bleeding or pooling, giving it an organic feel. Add these subtle details without overwhelming the line art.
3.  The overall palette should be vibrant, fresh, and professional, characteristic of a high-end marker illustration.

### OVERALL FINISHING:
1.  Ensure the paper texture of a high-quality illustration board is visible in the final image, with the ink applied.
2.  The colored lines should feel integrated, not just overlayed.
3.  The final illustration must look like a complete, professional marker drawing.
"""


#client = genai.Client(api_key="YOUR_GEMINI_API_KEY")
client = genai.Client()  # 環境変数 GEMINI_API_KEY を設定しておく

def edit_image(image_path: str, mime_type: str = "image/png") -> Image.Image | None:
    with open(image_path, "rb") as f:
        image_bytes = f.read()

    response = client.models.generate_content(
        #model="gemini-2.5-flash-image",
        model="gemini-3.1-flash-image-preview",
        contents=[
            SYSTEM_PROMPT,
            types.Part.from_bytes(data=image_bytes, mime_type=mime_type),
        ],
        config=types.GenerateContentConfig(
            response_modalities=["IMAGE"],
            seed=42, # 一応 seed 固定(seed 固定しても同じ絵ができるとは限らないらしい)
            image_config=types.ImageConfig(
                aspect_ratio="1:1",
                image_size="1K",  # "1K"(デフォルト), "2K", "4K"
            ),
        ),
    )

    for part in response.parts:
        if part.inline_data:
            return part.as_image()


def main():
    parser = argparse.ArgumentParser(description="Gemini-Image-Edit CLI")
    parser.add_argument("input_image", help="input image file path")
    parser.add_argument("output_image", help="output image file path")
    args = parser.parse_args()

    output_image = edit_image(args.input_image)
    if output_image is not None:
        output_image.save(args.output_image)
        print(f"saved: {args.output_image}")
    else:
        print("error")

if __name__ == "__main__":
    main()
モデルは gemini-3.1-flash-image-preview を使用。 gemini-2.5-flash-image は 2026年の秋くらいに終了してしまうらしい。
生成されるイメージのフォーマットは JPEG だった。 常に JPEG なのかは不明。
なお、今試したところ以下の通り:
- gemini-2.5-flash-image を使うと結果の画像フォーマットは PNG
- gemini-3.1-flash-image-preview を使うと結果の画像フォーマットは JPEG
AI がこんなデータの中身をみて png, jpeg, webp を判別するコードを教えてはくれた:
def detect_image_format(data: bytes) -> str:
    if data[:8] == b"\x89PNG\r\n\x1a\n":
        return "png"
    if data[:3] == b"\xff\xd8\xff":
        return "jpeg"
    if data[:4] == b"RIFF" and data[8:12] == b"WEBP":
        return "webp"
    return "unknown"
ただ、引数として渡した出力ファイル画像ファイル名を foo.png のように指定してしまっていたらどうするの?とか細かく対策をしていくととてもたいへんなコードになるので(今その件は本筋でもない)あきらめる。 → python img2img.py input.png output.jpg のように指定すれば済む話とする。
そもそも macOS なら file コマンドで file output.jpg のようにすれば、画像フォーマットが何かわかる。それを見てあとから適切に rename すればいいのかな、間違った拡張子で保存してしまった場合。
もし Python 3.9 以前で実行する場合は修正が必要。
##def edit_image(image_path: str, mime_type: str = "image/png") -> Image.Image | None:
def edit_image(image_path: str, mime_type: str = "image/png") -> Optional[Image.Image]:
というか型注釈を削除すればもとから Python バージョン依存はなくなるけど。
まとめ
無料(といっても GPU が高いから語弊あるけど)で Local 環境で使える Qwen Image Edit はすごい。 一方で Nano Banana は品質が十分高く、処理時間も短く、コードも簡単で、いろいろ取り扱いが楽。 ただし、Nano Banana はきれいに仕上げすぎていて、Qwen Image Edit が生成した絵の方が個人的には気に入っている。 もっともそのあたりはシステムプロンプトを調整することで何とでもなる部分なのかもしれない。
追伸 改良版
Nana Banana が生成した画像の中身から拡張子を判別していい感じに出力画像ファイル名を解決するバージョンの img2img.py:
import argparse
from pathlib import Path

from PIL import Image
import base64
from google import genai
from google.genai import types


def detect_image_format(data: bytes) -> str:
    if data[:8] == b"\x89PNG\r\n\x1a\n":
        return "png"
    if data[:3] == b"\xff\xd8\xff":
        return "jpeg"
    if data[:4] == b"RIFF" and data[8:12] == b"WEBP":
        return "webp"
    return "unknown"


SYSTEM_PROMPT = """
### SYSTEM PROMPT ###

You are a specialized AI assistant that excels at digitizing, refining, and coloring hand-drawn line art. Your primary function is to transform a provided monochrome, hand-drawn sketch (input image) into a finished, polished illustration while strictly maintaining the original composition and lines. The coloring style must be that of professional Copic markers.

### INPUT PROCESSING AND REFINEMENT:
1.  Analyze the provided monochrome input image. Maintain all lines, forms, and details of the original drawing.
2.  Refine the line art: enhance the hand-drawn lines. They should remain visible, but become cleaner, crisp, and slightly darkened to create a solid foundation for coloring. Preserve the unique character of the original ink or pencil lines. Ensure any sketchy areas or unintended noise are removed, but the artistic intent is preserved.
3.  The refined line art must be the primary structure of the final output.

### COLORING (COPIC MARKER STYLE):
1.  Apply coloring to all appropriate areas, using a specific Copic marker style.
2.  Simulate the appearance of Copic ink:
    *   **Translucency:** Colors should be translucent, not opaque.
    *   **Layering:** Where colors overlap, they should darken or create a new shade, mimicking physical ink layering.
    *   **Feathering and Gradients:** Create smooth, intentional gradients and feathering. Avoid flat, solid color fills. Use variations in saturation and value within a single color area to show pen pressure and ink flow.
    *   **Blending:** Colors should blend seamlessly where they meet.
    *   **Edge Details:** Pay attention to the edges of colored areas. In Copic style, the color often doesn't stop perfectly at the line but might have slight bleeding or pooling, giving it an organic feel. Add these subtle details without overwhelming the line art.
3.  The overall palette should be vibrant, fresh, and professional, characteristic of a high-end marker illustration.

### OVERALL FINISHING:
1.  Ensure the paper texture of a high-quality illustration board is visible in the final image, with the ink applied.
2.  The colored lines should feel integrated, not just overlayed.
3.  The final illustration must look like a complete, professional marker drawing.
"""


#client = genai.Client(api_key="YOUR_GEMINI_API_KEY")
client = genai.Client()  # 環境変数 GEMINI_API_KEY を設定しておく

def edit_image(image_path: str, mime_type: str = "image/png") -> tuple[Image.Image, str] | None:
    with open(image_path, "rb") as f:
        image_bytes = f.read()

    response = client.models.generate_content(
        #model="gemini-2.5-flash-image",
        model="gemini-3.1-flash-image-preview",
        contents=[
            SYSTEM_PROMPT,
            types.Part.from_bytes(data=image_bytes, mime_type=mime_type),
        ],
        config=types.GenerateContentConfig(
            response_modalities=["IMAGE"],
            seed=42, # 一応 seed 固定(seed 固定しても同じ絵ができるとは限らないらしい)
            image_config=types.ImageConfig(
                aspect_ratio="1:1",
                image_size="1K",  # "1K"(デフォルト), "2K", "4K"
            ),
        ),
    )

    for part in response.parts:
        if part.inline_data:
            raw_bytes = part.inline_data.data
            actual_format = detect_image_format(raw_bytes)

            generated_image = part.as_image()
            generated_image.save("__output.jpg")
            return generated_image, actual_format


def resolve_ext(f: str) -> str:
    if f == "png":
        return "png"
    elif f == "jpeg":
        return "jpg"
    else:
        return "jpg" # 不明だったら jpg で

def fix_ext(path: str, ext: str) -> str:
    p = Path(path)
    if p.suffix.lstrip(".").lower() == ext.lower():
        return str(p)
    return str(p.with_suffix(f".{ext}"))

def main():
    parser = argparse.ArgumentParser(description="Gemini-Image-Edit CLI")
    parser.add_argument("input_image", help="input image file path")
    parser.add_argument(
        "output_image",
        nargs="?",
        default=None,
        help="output image file path (auto-generated from input filename if omitted)",
    )
    args = parser.parse_args()

    output_base = args.output_image or Path(args.input_image).stem + "_edited"

    result = edit_image(args.input_image)
    if result is not None:
        output_image, image_format = result
        ext = resolve_ext(image_format)
        output_path = fix_ext(output_base, ext)
        output_image.save(output_path)
        print(f"saved: {output_path}")
    else:
        print("error")

if __name__ == "__main__":
    main()
二番目の(出力画像ファイル名)引数を省略可能にした、したがって次のように使うことができる:
python img2img.py input.png
結果は input_edited.jpg か input_edited.png になる。拡張子は Nano Banana が生成した画像の中身から決定される。